
WordPress + Google Analytics The Ultimate Guide
Google Analytics is a free service from Google that lets you track visitors to your website. You can get lots of details, including where your traffic is coming from and clues as to why people are bouncing off your site.
There are a few ways to add Google analytics to your WordPress site. Some are better than others. You can add it via plugin or by manually adding code into your WordPress theme.
One thing to note is depending how you add it, it can slow down your site speed. In this guide I am going to show you the ways to add Google Analytics to your site that will slow it down the least. Fast site, happy life.
Table of contents:
- How To Host Google Analytics Locally In WordPress
- Best WordPress Google Analytics Plugin
- WordPress Google Analytics Code
- Host Google Analytics Locally Using WP Rocket
- How To Find Google Analytics Tracking ID
- Leverage Browser Caching Google Analytics
How To Host Google Analytics Locally In WordPress
Hosting Google Analytics locally is the way to make your site load the fastest and speed up Google Analytics. Hosting locally means that your site has a copy of the Google Analytics script on its server so that it doesn’t have to go and download it every time a page is loaded.
To host Google Analytics locally it is best to use a plugin like Complete Optimization Suite or if you are using WP Rocket for caching, enable the Google Analytics add-on using the instructions below.
Best WordPress Google Analytics Plugin
Complete Analytics Optimization Suite, COAS for short is the best WordPress Google Analytics plugin.
It is free and will not drag down your site’s performance.
The problem with hosting Google Analytics locally (and the reason Google recommends against it) is that you have to keep your local copy of the analytics.js script updated. Google regularly makes updates to the script and you need to always have the latest version.
The COAS plugin not only hosts Google Analytics’ code locally but it regularly updates it. It automatically will save a new copy of the analytics script to your site using a cron job.
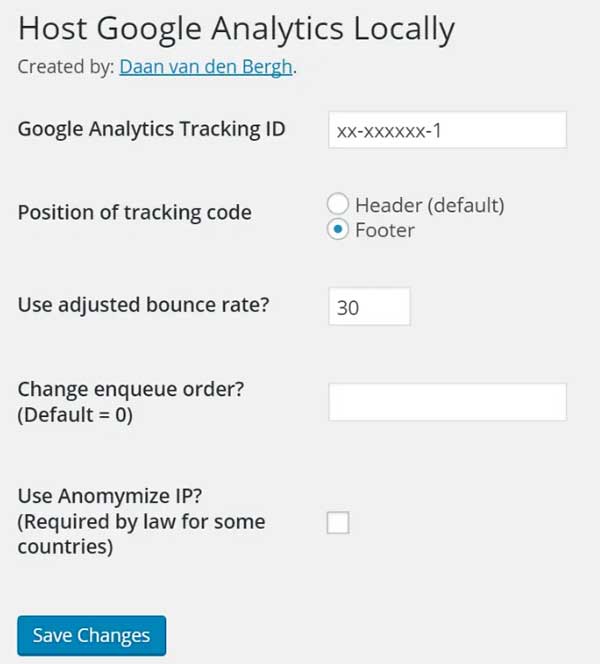
To add Google Analytics to your WordPress site using the Complete Optimization Suite, install the plugin and in the plugin’s settings page you add your Google Universal Analytics Tracking ID. Replace the xx-xxxxxx-1 with your ID.
Pro Tip
You do not want to use Google Analytics plugins that load reports into your WordPress dashboard. These types of plugins will slow your site down. It is always best to view your analytics data directly on the Google Analytics website.
If you are using WP Rocket for caching or want to manually add Google Analytics code to WordPress use the instructions below.
WordPress Google Analytics Code
The traditional way to add Google Analytics to your website is to add the tracking code to your site’s header or footer.
In WordPress you do this by editing your sites theme. I like to edit the theme’s footer and add the tag code there.
Google has two versions of its tracking code. The default one works on every browser but it is render blocking and will slow your site down.
You want to use the alternative async tag. It doesn’t work properly with browsers older than IE9 but luckily that is not many these days so it is a risk worth taking.
Add the code below to your site’s footer. Make sure to replaced UA-XXXX-Y with your ID.
Alternative async tag
<!-- Google Analytics -->
<script>
window.ga=window.ga||function(){(ga.q=ga.q||[]).push(arguments)};ga.l=+new Date;
ga('create', 'UA-XXXXX-Y', 'auto');
ga('send', 'pageview');
</script>
<script async src='https://www.google-analytics.com/analytics.js'></script>
<!-- End Google Analytics -->
If you need more details about Google Analytics code visit the Google Developer Blog.
Host Google Analytics Locally Using WP Rocket
If you have WP Rocket, add the Google Analytics code to your site using the Instructions above.
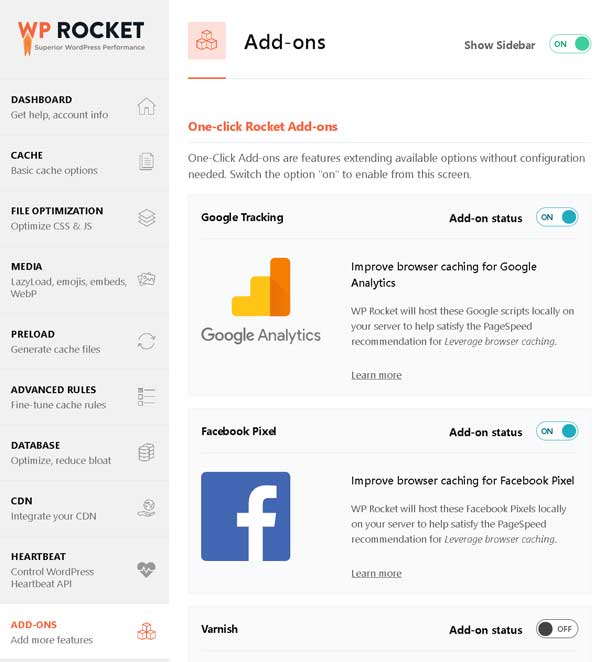
Once you have added the code to your site, go into WP Rocket’s settings panel. Click ADD-ONS and then turn on the Google Tracking Add-on. This will host the Google Analytics script locally as well as fixing leverage browser caching errors.
How To Find Google Analytics Tracking ID
- Sign in to your Analytics account.
- Click Admin.
- Select an account from the menu in the ACCOUNT column.
- Select a property from the menu in the PROPERTY column.
- Under PROPERTY, click Tracking Info > Tracking Code. Your Universal Analytics Tracking ID is displayed at the top of the page.
Leverage Browser Caching Google Analytics
If you have ran a speed test on your WordPress site using a tool like Pingdom or GTMetrix, you may have seen a suggestion that you need to leverage browser caching.
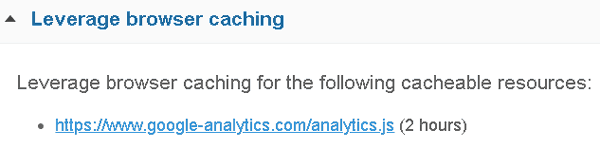
Hosting Google Analytics locally is the solution to leverage browser caching in WordPress. If it is hosted locally you can cache it with your WordPress caching plugin.
Conclusion
In this post you learned how to host Google Analytics locally and how to leverage browser caching for Google Analytics.
You are one step closer to having a faster website and top scores on Google’s PageSpeed Insights.
If you have questions, feel free to ask them in the brand new Pro Site Help Facebook group.